Just thought I would provide another short update on progress over the last few weeks – have been busy again at work so less time spent on the shed.
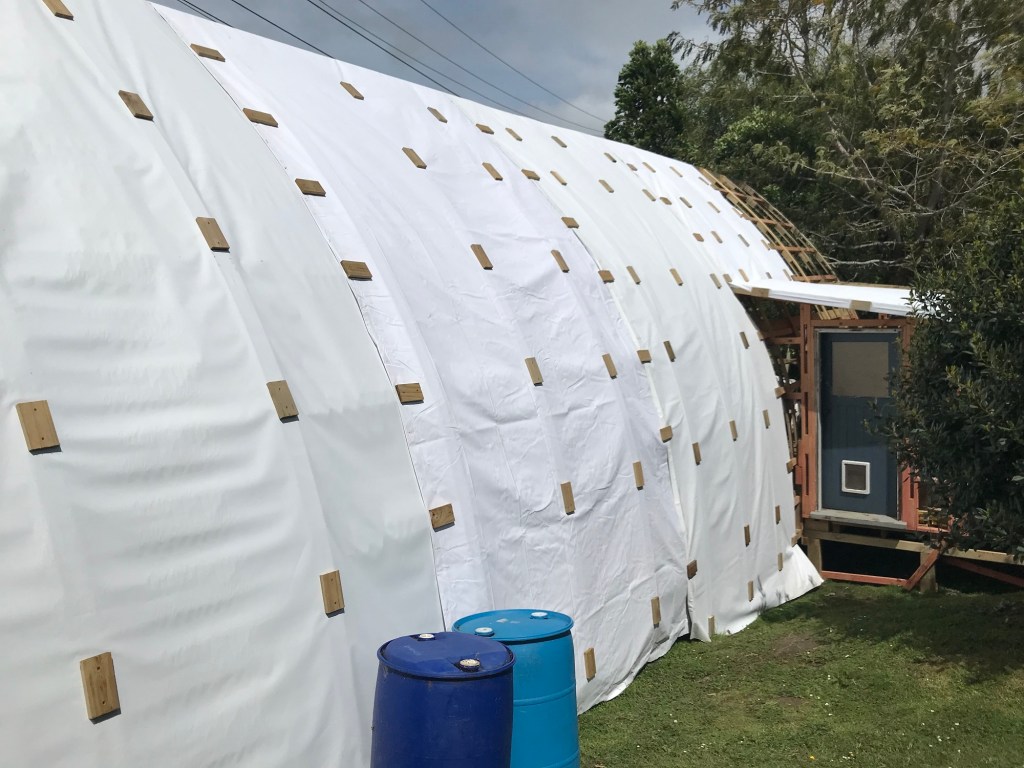
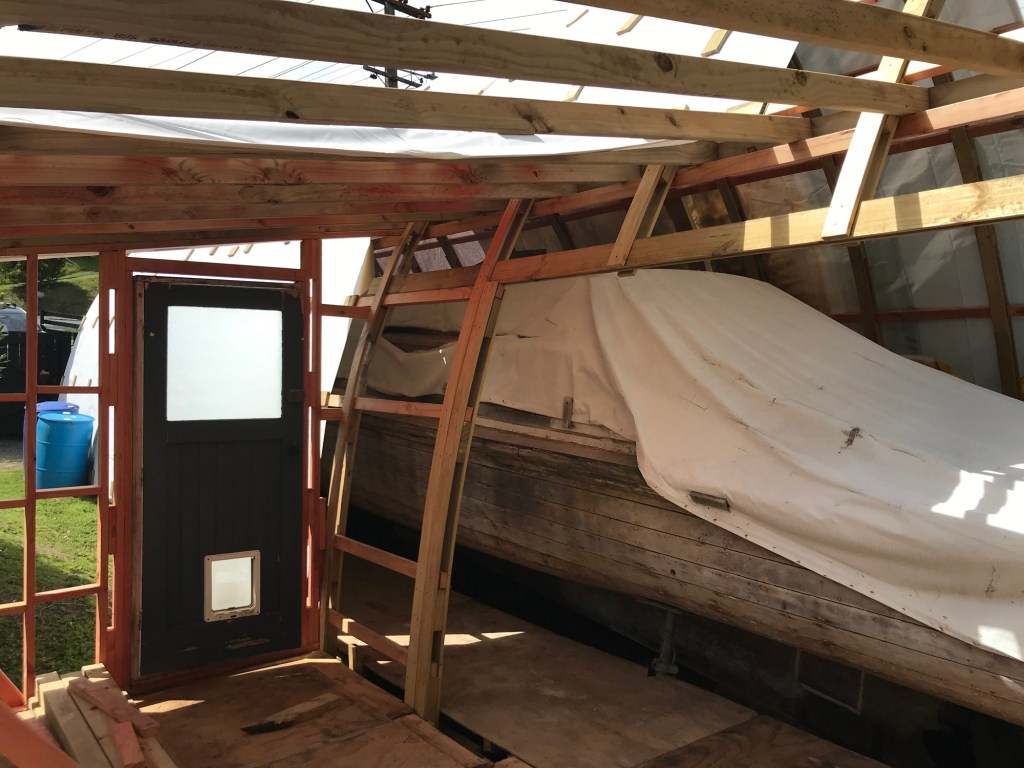
All trusses up, bracing and purlins in, trimmed top roof beam, formed opening between shed and the workshop, workshop subfloor and ply floor down, wall framing up, workshop rafters in place. Shed subfloor in place plywood floor in progress, most of the tarps are on (one to go) workshop door is in, windows ready to go.
Balance of work to complete;
Last roof tarp to go on
Complete screwing down shed plywood floor
Cladding to 3 walls of workshop
Two windows to go in
Two end walls of shed to be framed and tarped
Louvre vents to end walls
Entry steps
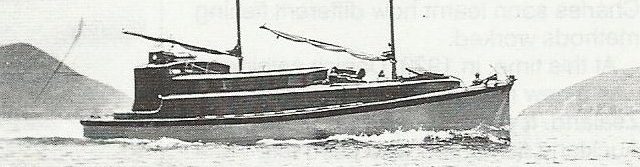
Level ANZAC
Remove covers from ANZAC
Waterblast ANZAC and ply floors
Paint plywood floors
Roof cover straps
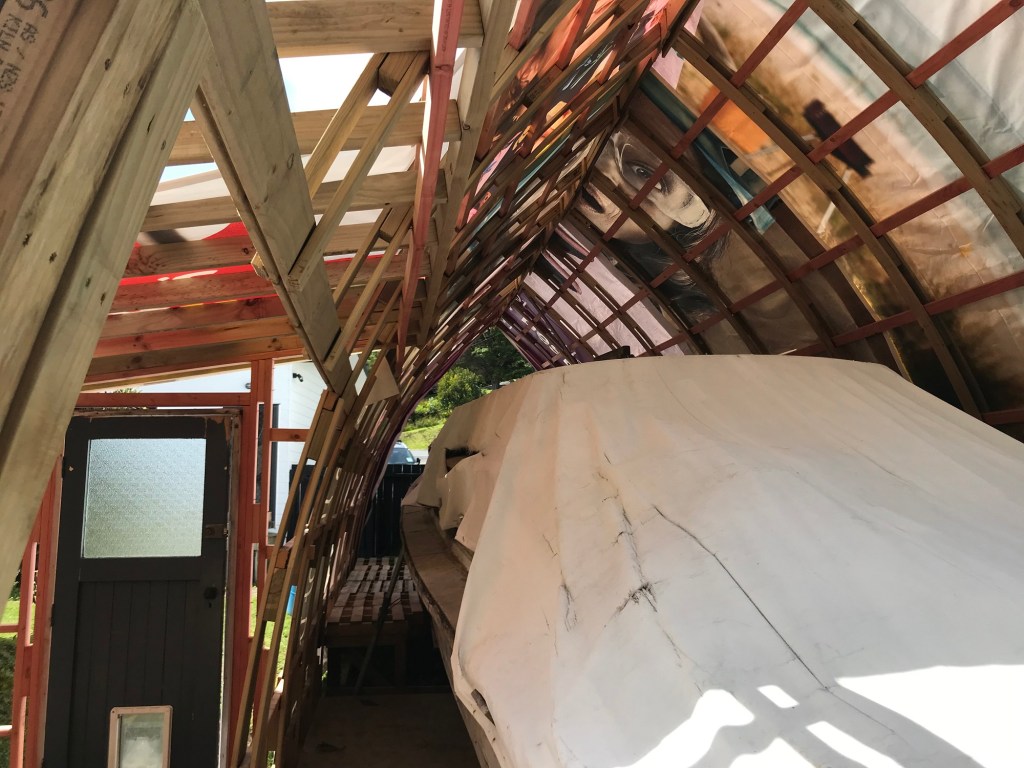
First of the tarps onWorkshop subfloor going down Tarps, purlins and bracingMore tarps onInside viewWorkshop areaInside view
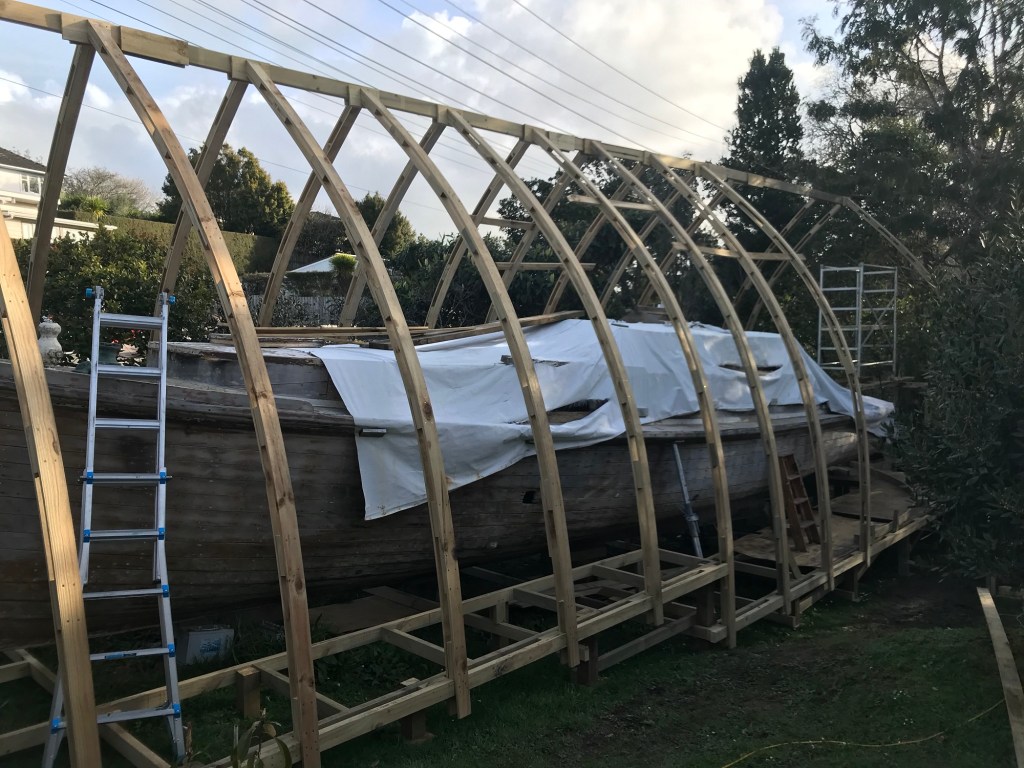
The first port of call is to build a new boat shed. I have decided to follow the last design and use arches. It will be slightly different as I will add a workshop space to the side as a sort of a lean-too. Here is how it was built (note -the majority of this structure was built single handed, which made it at time difficult but not impossible);
“A How to Guide”
Setout – ANZAC is 12m long plus a duck board so say 13m overall if I allow 1m at each end to work and walk around, then 15m should be about right. The width I settled on was 4m, as this was easy to remember and measure from the center of the keel. the lean-too workshop I will be another 5m x 2m, but I will build that after I have the boatshed built.
I have intended to build the entire structure with no permanent fixings (apart from nails) so it will not have concreted posts and most members will have screw fixings. As it is not a permanent structure just a boat cover (Nod, wink).
Setout was simply marking out the center of the boat and projecting this out aft and stern measuring the 1m walking and working space (mentioned above) then marking 2m either side of those points to give me approximate corners of the shed.
Its important to start with the base before building any arches – don’t even worry about the arches until you have the sub base and walkway framing completed – we will come to the reason why later.
Using 100×50 framing I framed up what would be the basic shape. The squaring up and leveling will happen as I add the posts and bracing, for now it is just to get the shape and size about right, this ends the set out phase.
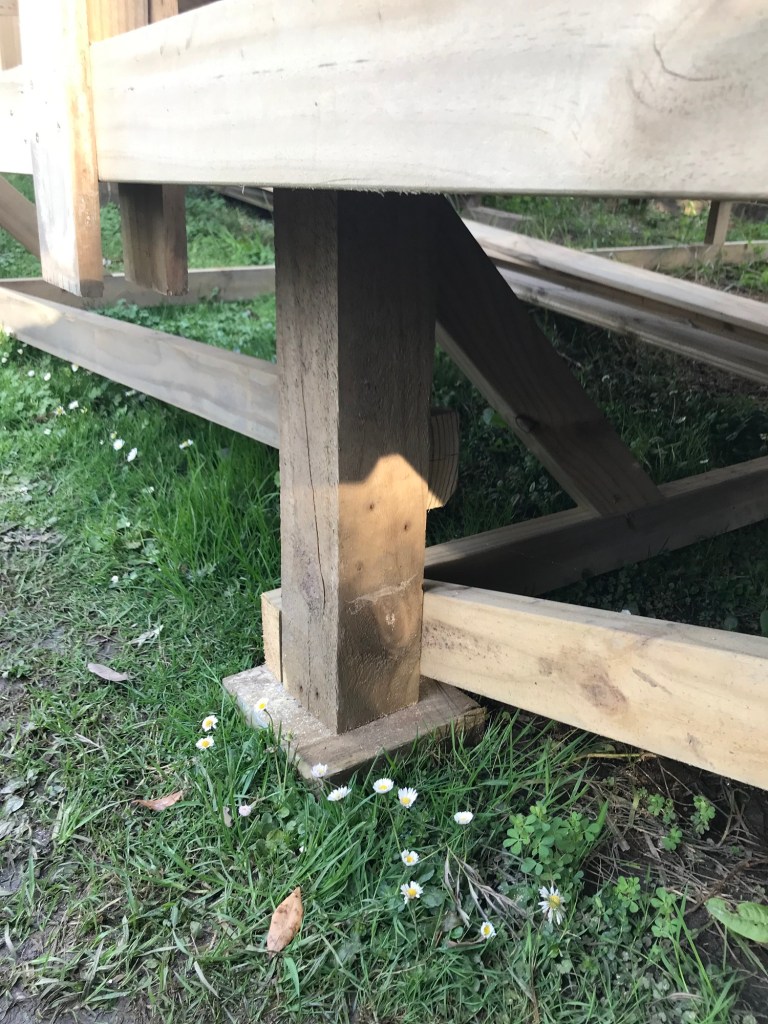
Base and Sub Base Framing – Now I installed the posts, these were a mix of posts I had kept from my previous shed and other posts I had lying around – but using 100×100 or 125 x125 posts worked fine. I rebated a section at the top of each post to take the 100×50 perimeter frame and fixed a square timber base plate made from 250×50 framing (so 250×250 square) to prevent the post sinking into the ground.
One of the 125×125 posts showing bracing and timber pad
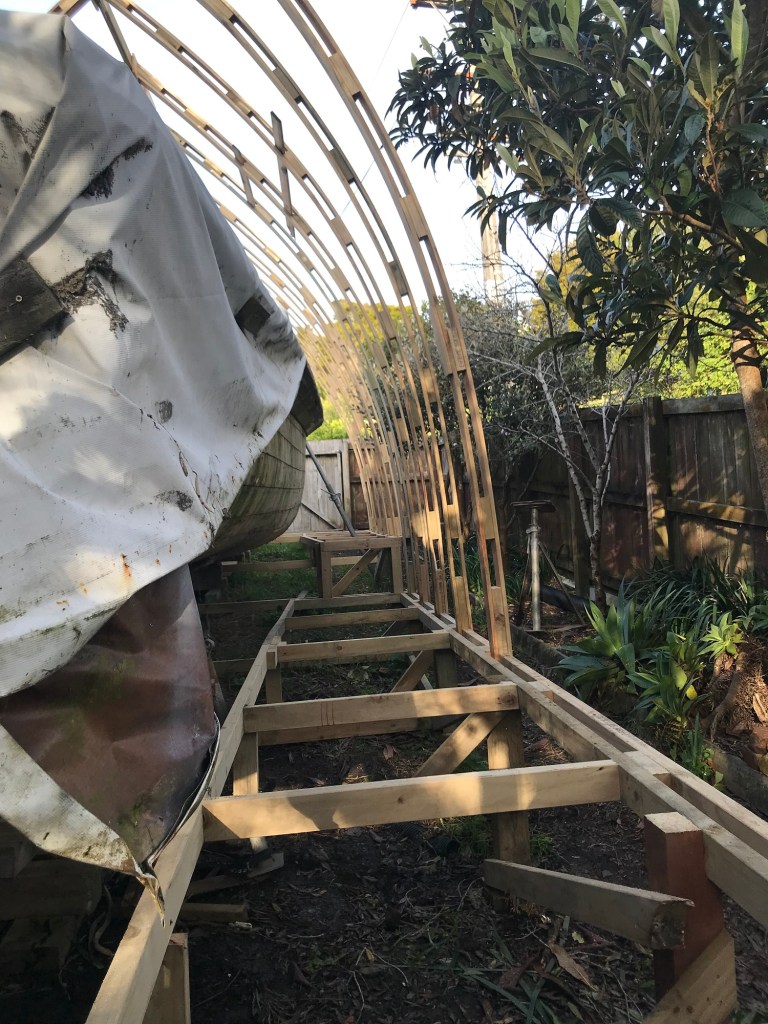
Starting form the stern I raised the perimeter frame to the level that I wanted for the working walkway by cutting the posts to the desired height, added in the cross framing walkway frame and bracing – all out of 100×50 framing.
Important – to stop the base of the structure from wanting to explode outwards it is important to fix the posts on opposite sides together i.e. each post is fixed via a 100×50 runner at the base of each post from the port side to the starboard side.
100×50 runner spanning from one side to the other (post to post) here I have used the same runner to support the perimeter walkway framing.
As my shed is on a slope, so I have added a step in the structure and the walk way. I intend to level ANZAC out once I have the shed complete. Ideally the shed would have been on flat ground and the vessel would already be level but I have to work with the sloping ground.
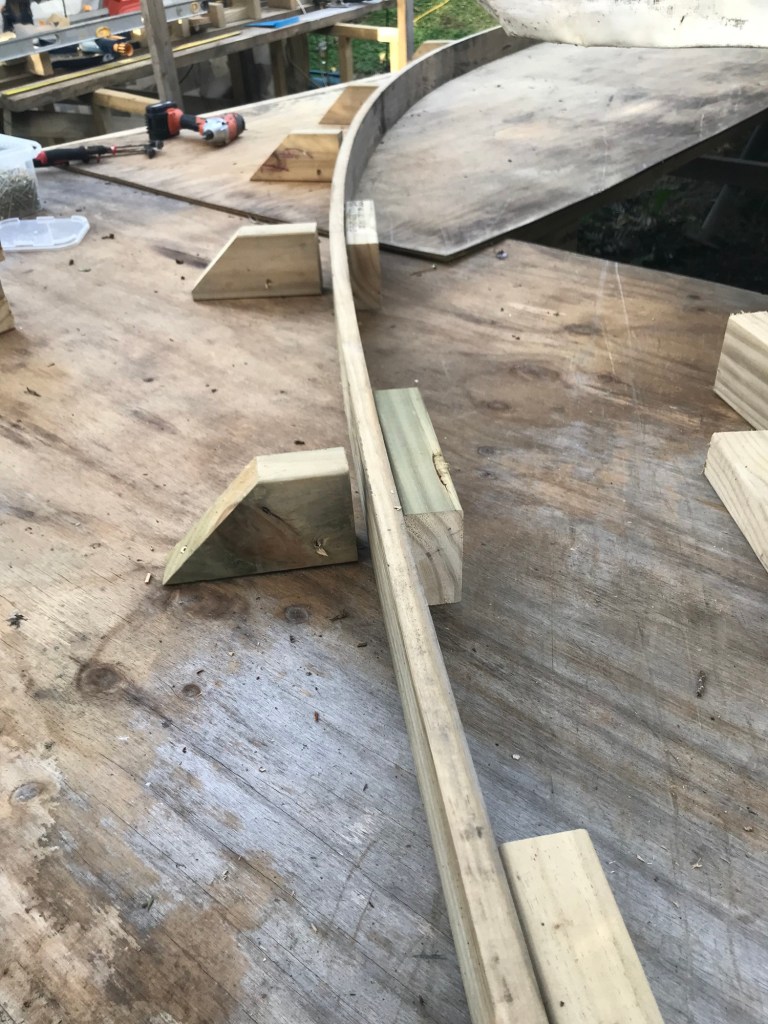
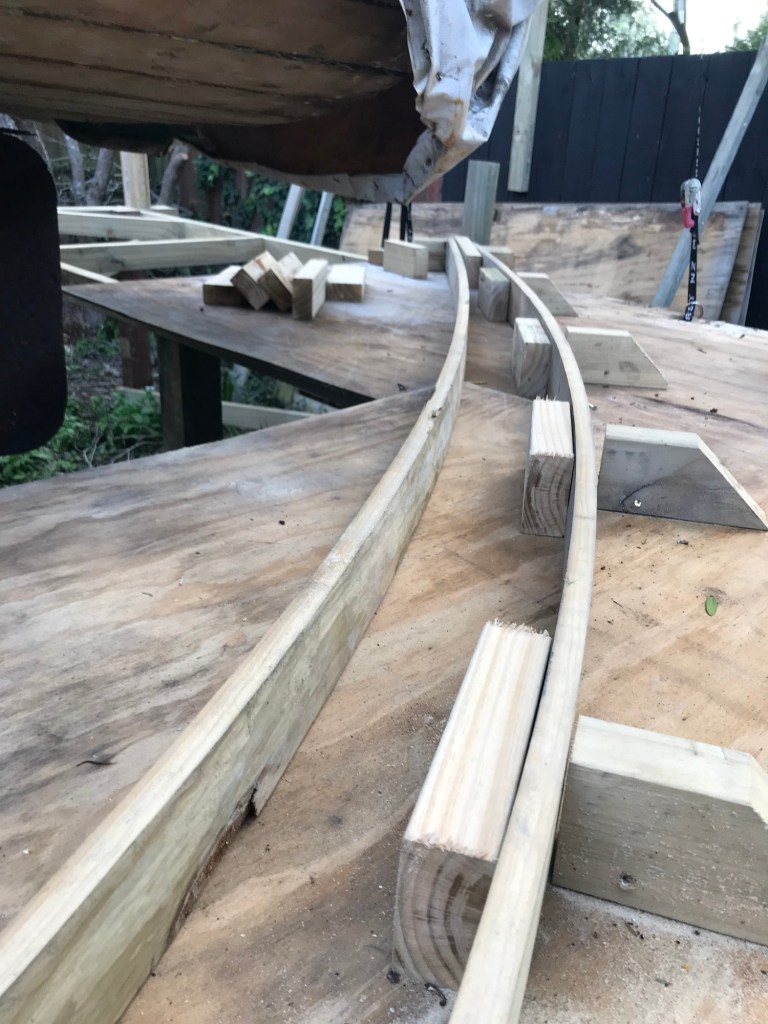
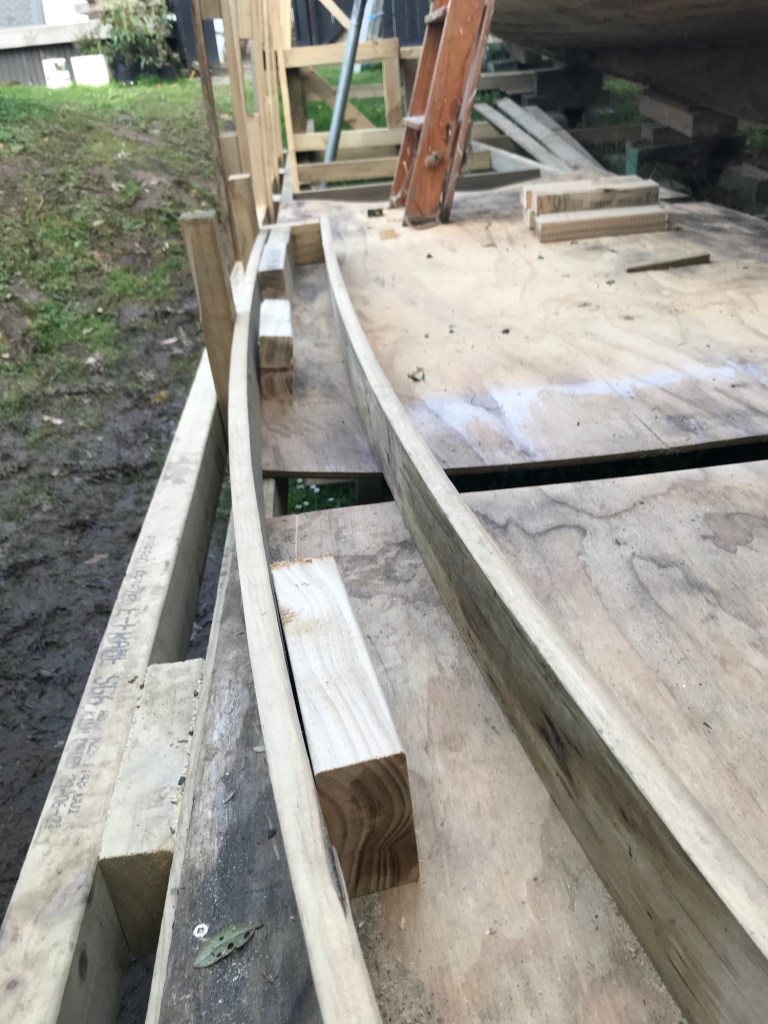
Arches Rail – Once the base and sub base framing was installed, squared etc. I added a 100×50 rail with spacers (100×50) to the two 15m lengths – (first the spacers then the rail – these will take the load of the arches. Note – I purposefully made the length of the shed a further 300mm longer at each end so the end arches would form a overhang to the end walls. The rail is the same length.
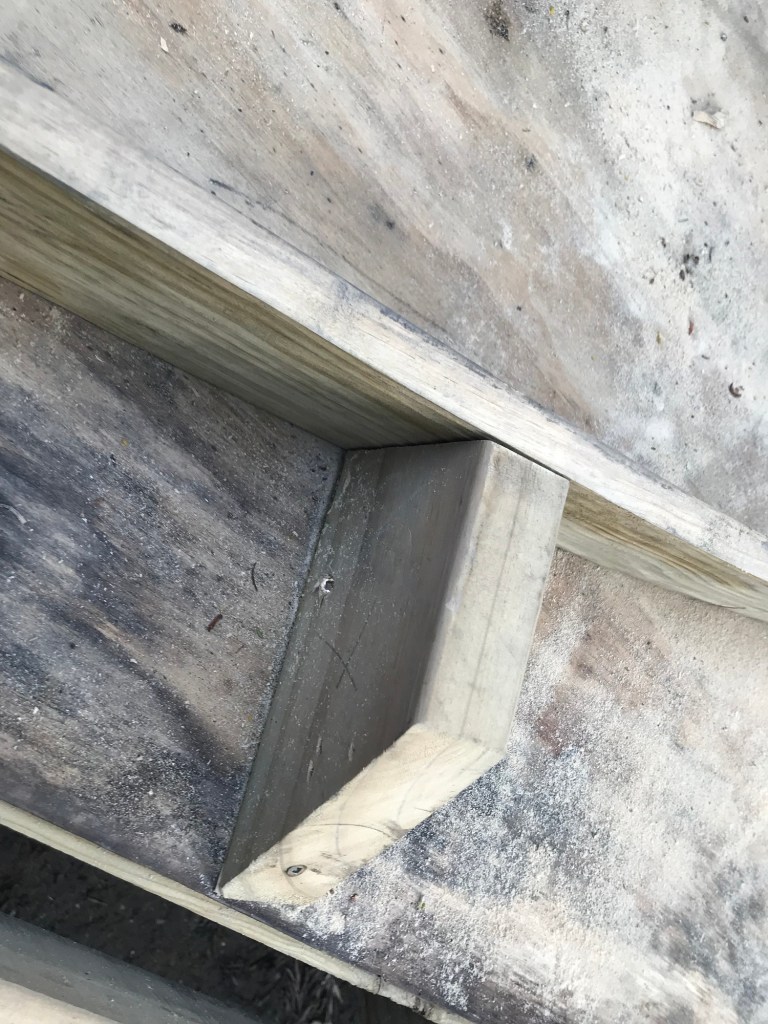
Important – the spacers for the rail have been fixed to locate the position of each arch, in my case ever 1m – making it easier to install – the spacers are also the same thickness as the spacers we will use for the arches.
Space with the outer perimeter rail showen with an arch fixed in place. Note that the nogs in the arch is the same thickness as the perimeter rail – easy and snug fit.
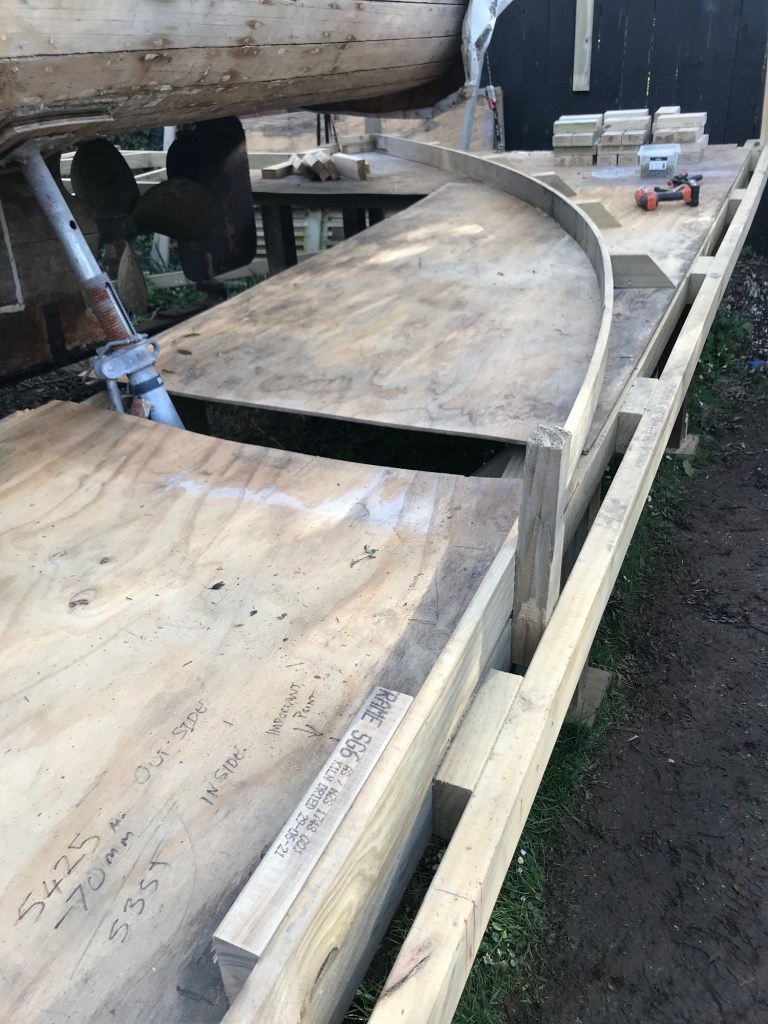
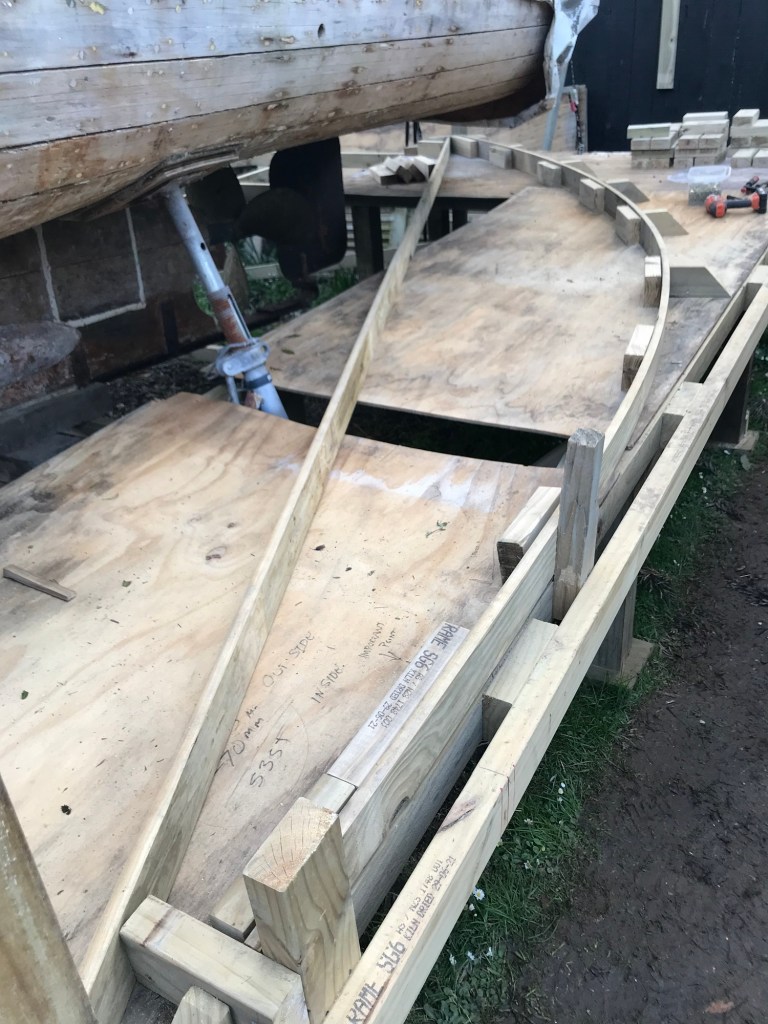
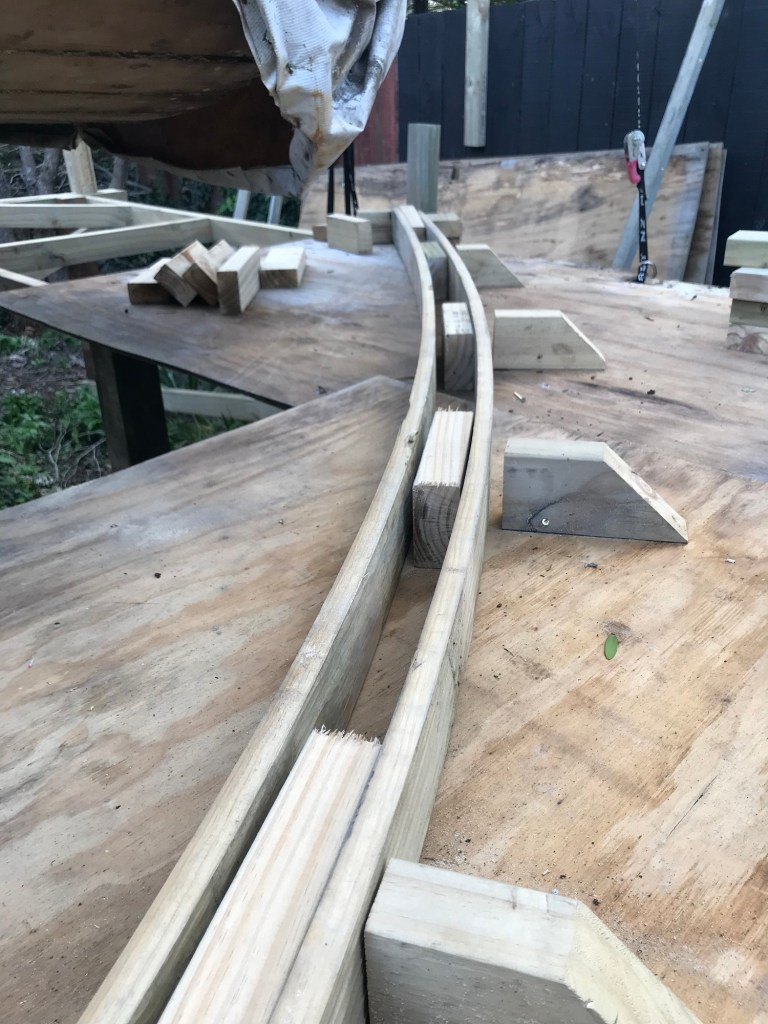
Arches – Now we start on the arches. First step was to set out the template. I had three sheets of plywood which I temporarily fixed to half of one end, and down 5m of one part of the side (refer picture) this is to provide a flat surface to mark out the arch.
The end closest is the base of the arch – this is lined up with the perimeter rail (not the outer one as the truss will give a little when released). A vertical post has beed fixed at the top of the picture which forms the top of the arch and is located exactly at the mid point of the 4m wide base frame.
I wanted more of the bend in the arch to be at the top so I installed another vertical post about 1m from the base this will keep the lower 1m straight (see above). I then install stop ends to the base and the top ends of the arch.
Base stop end
Stop ends at the top of the arch with post marking center line of shed.
Install a vertical post at the center line of the vessel – this forms the top of the arch and stop ends.
I have decided to use slightly small arches than the first shed but have them a closer centers. The arches are made from 100×25 pine with 100×50 packers and will be spaced at 1m centers. They are approximately 5.4m long (standard supplied length).
I then placed a length (5.4m long) 100×25 in between the 2 stop ends and let it curve to its own arch – then I added support nogs a 5 or 6 locations at where the timber found its natural arch – these will be where I add the nogs to the arch. All the nogs in the arch are 100×50 framing the same size as the perimeter rail – the top and bottom nogs are both 300mm long while the oyer 7 nogs I have used are 200mm long.
Support nogs shown above with 200mm nogs
Note – it is important that all the nogs end up in the same position as each other – so I marked in perminant pen on the plywood where each nog is ment to go.
Support nog
I am using gib screws to fix the framing together – I have found that there is no need for glues, boths etc. Just 2 clamps, a drill and a skill saw.
When building the archI install the outer layer (100×25) first. then place and screw fix teh nogs, then I present the inner arch – this will need to be cut shorter – in my case 70mm shorter. You will need to look out for knots in the wood as these are likely places for breakages – if you present the frame to the template slowly you will have only a few breakages – expect some is all I can say. I have managed to save some when there have been cracks – the cracks can be reinforced using screws and off cuts over the cracks.
Presenting the inner arch – it is locklocked in to the top just using the stop ends. Nearest the camera you can see that the bottom stop end will hold the arch in position once we get to the correct curviture.Slowly drag the inner arch towards the nogsDragging closer and closerThe inner arch length gets closer to “popping”into the bottom stopperThe top end stoppers have done their jobThe bottom stoppers have now taken the “weight” of the inner archAt the base of the arch I place a packer this one is 250mm longh – it is not screwed in but it keeps the bottom nog in exactly the correct position so that all the arches will be the same height
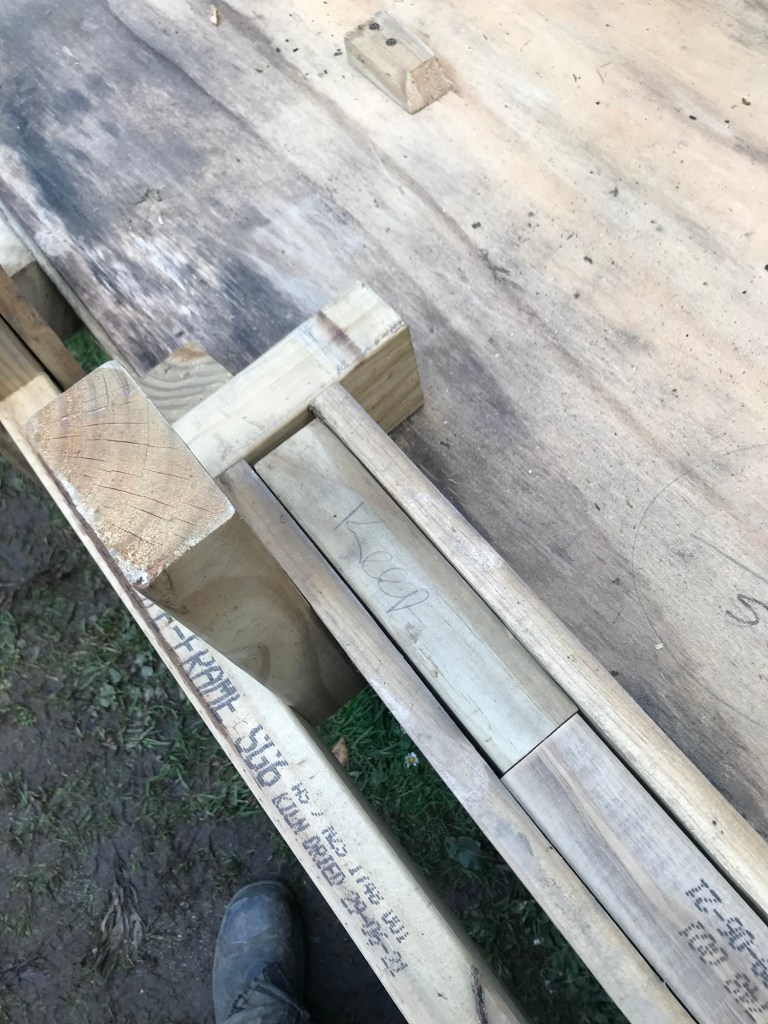
Once the inner arch is in it too is screwed off. At the base I use a “keeper” nog to ensure that the lowerst nog is always in the same position that way each arch will be the same height.
Important – The outer arch can be srewed off in any order, but it is important to screw off teh inner arch from the top first and work your way down to the base – this ensures that each arch is teh same height. Trust me it works! You will find the inner arch will get even shorter or tighter – this will help the arch keep is shape and for all the arches you make almost exactly the same each time.
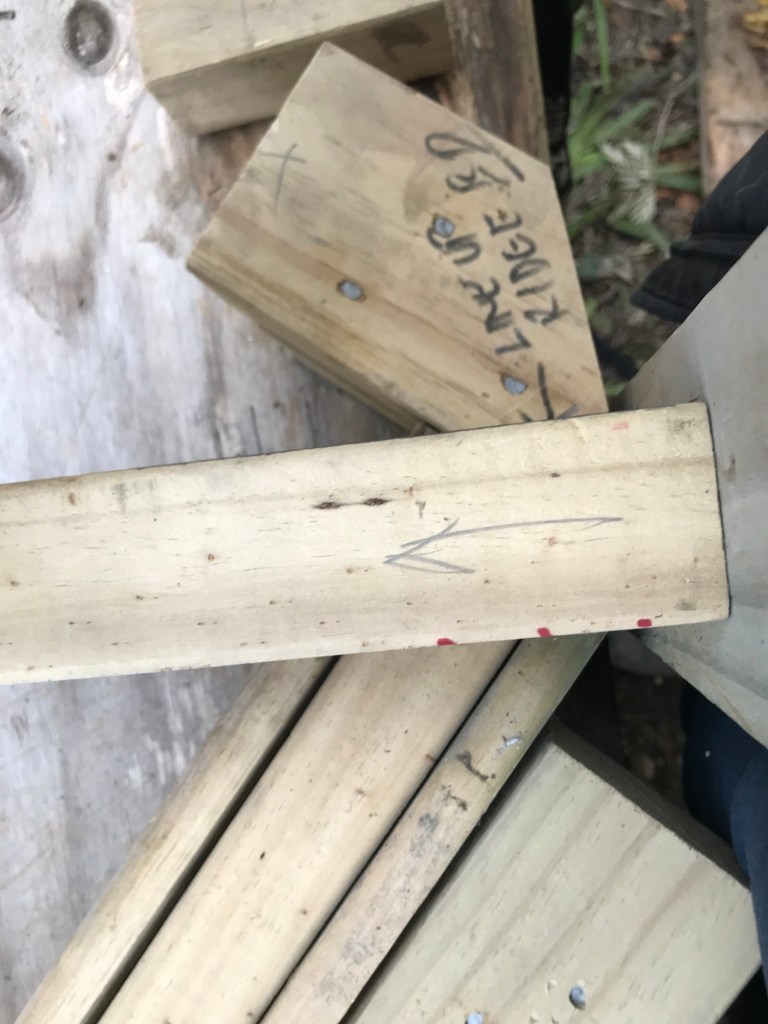
Before we remove the arch from the template we need to mark the top of the arch at the correct angle so it can fit the “ridge” board.
Ridge board template placed over arch and mark inside edge to be cut
At the top end of the arch we have a few small considerations to think about – even where I screw the inner arch we need to think about where the screws go as we will trim the top to take the ridge board – I marked out on the plywood below an area where not to install screws when fixing teh inner arch – it avoids you cutting them off or in half. The other cosideration is to get the correct angle (90 degrees) for the ridge board – I simply had a 100×50 off cut which I outlined on the post so to line it in the same place each time, then looking down as per above I marked the cut angle.
Mark and cut this line
I then remove the arch from the template and add a fixing plate (150×20 by 300mm long) timber screw fixed to the end we just cut, I have found it makes it easier when fixing to the ridge board.
I will add a further post on the finishing off of the shed when I get to it.
Final Words – I have found of the 30 trusses I have had to make for this shed I have had 4 boards as I presented them snap, another 3 crack – but I could repair and use them and about 4 no matter what i did wanted to form a second twist. It wood and will do what it wants – there is one I might replace as it does not sit right. But it looks bloody impressive!
Important measurements I used perminant marker and kepth them in front of me.
It has been a while since the last post (March 2019 – so 30 months!) I have moved house worked on renovating said house, world wide health crises – lock downs
I have done some scratching around on ANZAC but nothing of note or worth a post – however I have been busy elsewhere, completing work on the new house – so keeping her in doors happy. Work included;
Painted the entire outside of the house
New family bathroom
New kitchen
New outdoor living area
Landscaping, hard and soft
Refurb 3 bedrooms and hallway
I only have the garage, laundry, en-suite, a deck replacement 100m2, spa pool enclosure and balance of fence painting (in summer). But this is not a home improvements blog!
In addition – during this time away from work on ANZAC – my uncle, who has been my labourer, had deteriorated health-wise, and passed away in February of this year.
This is just a quick post to say we are back underway with work on ANZAC. Currently building a new boat shed – posts to follow (one good use of a lockdown).
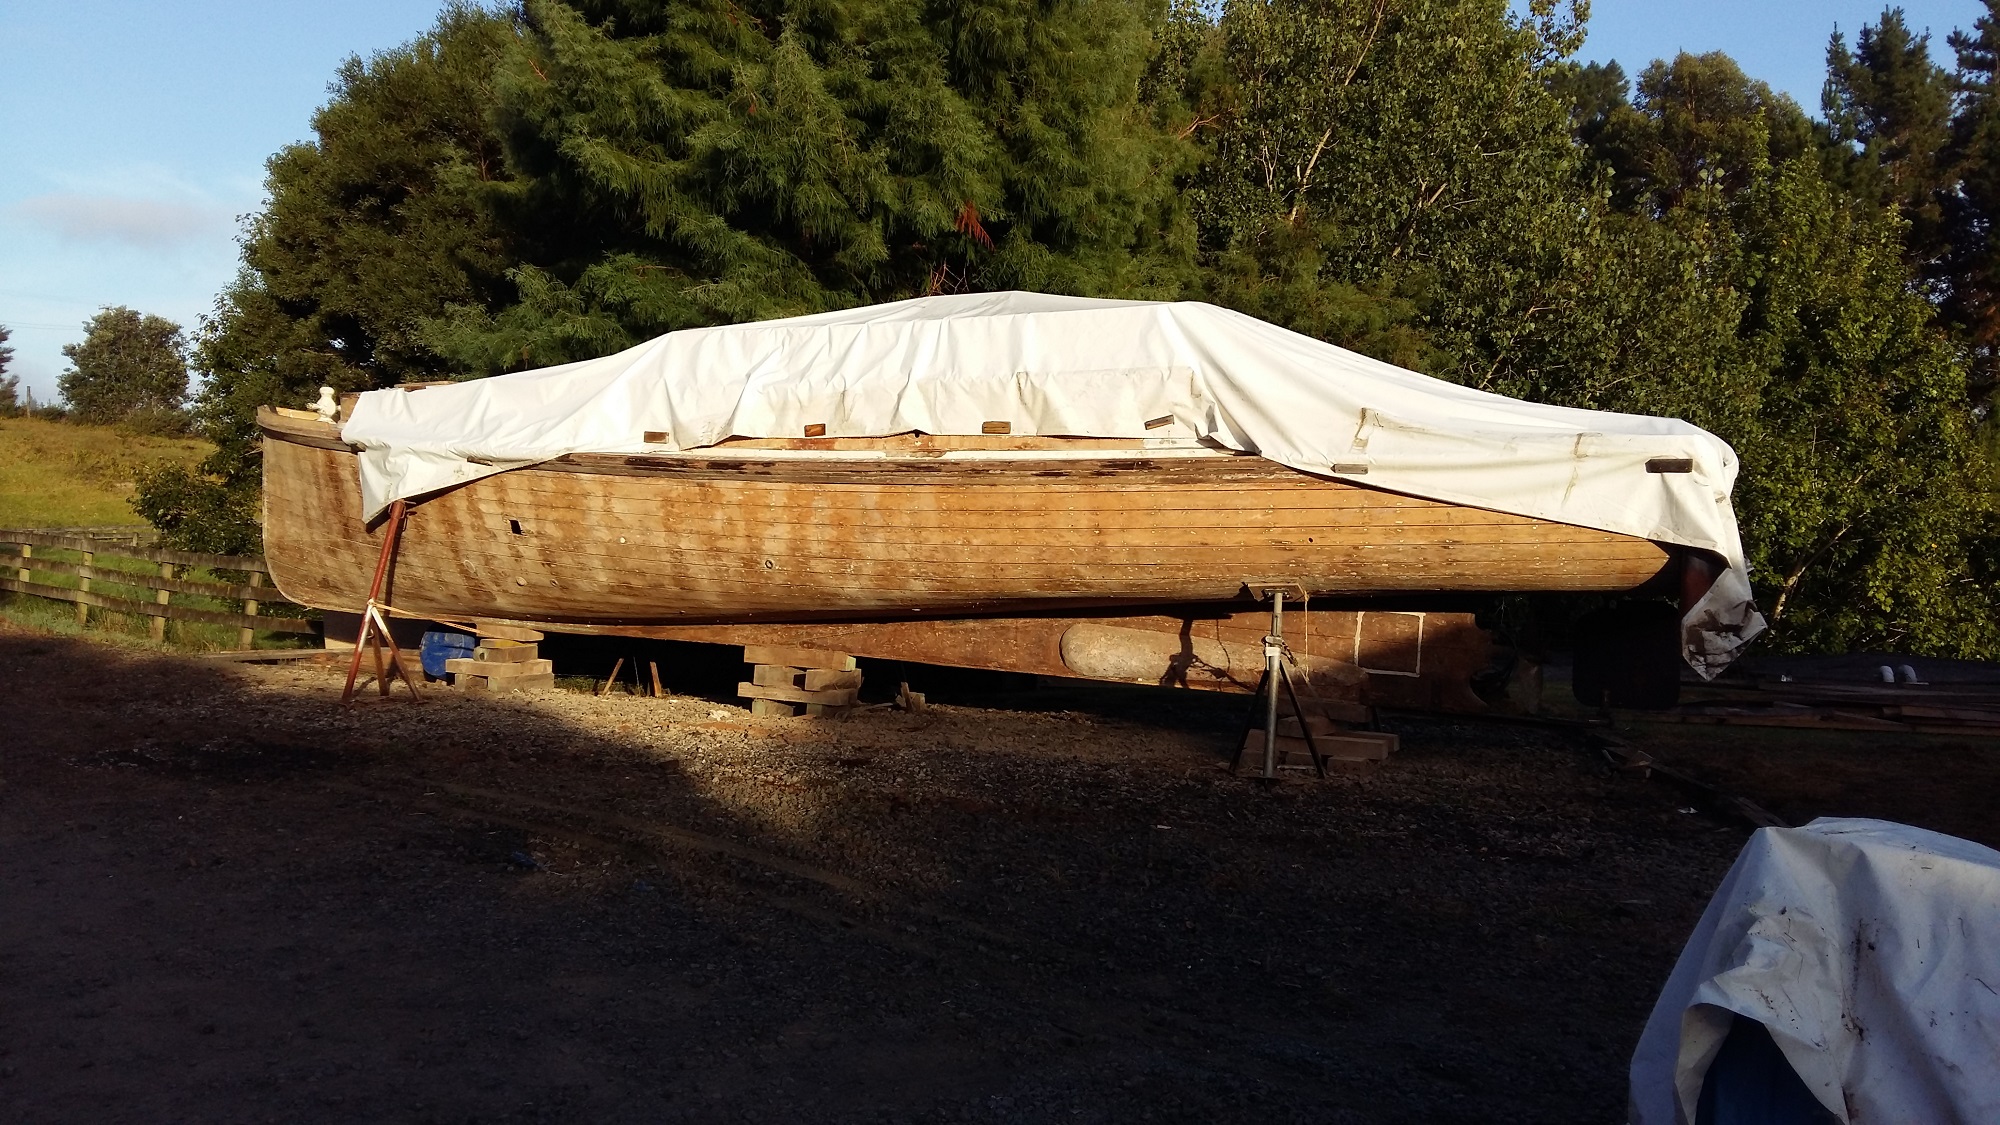
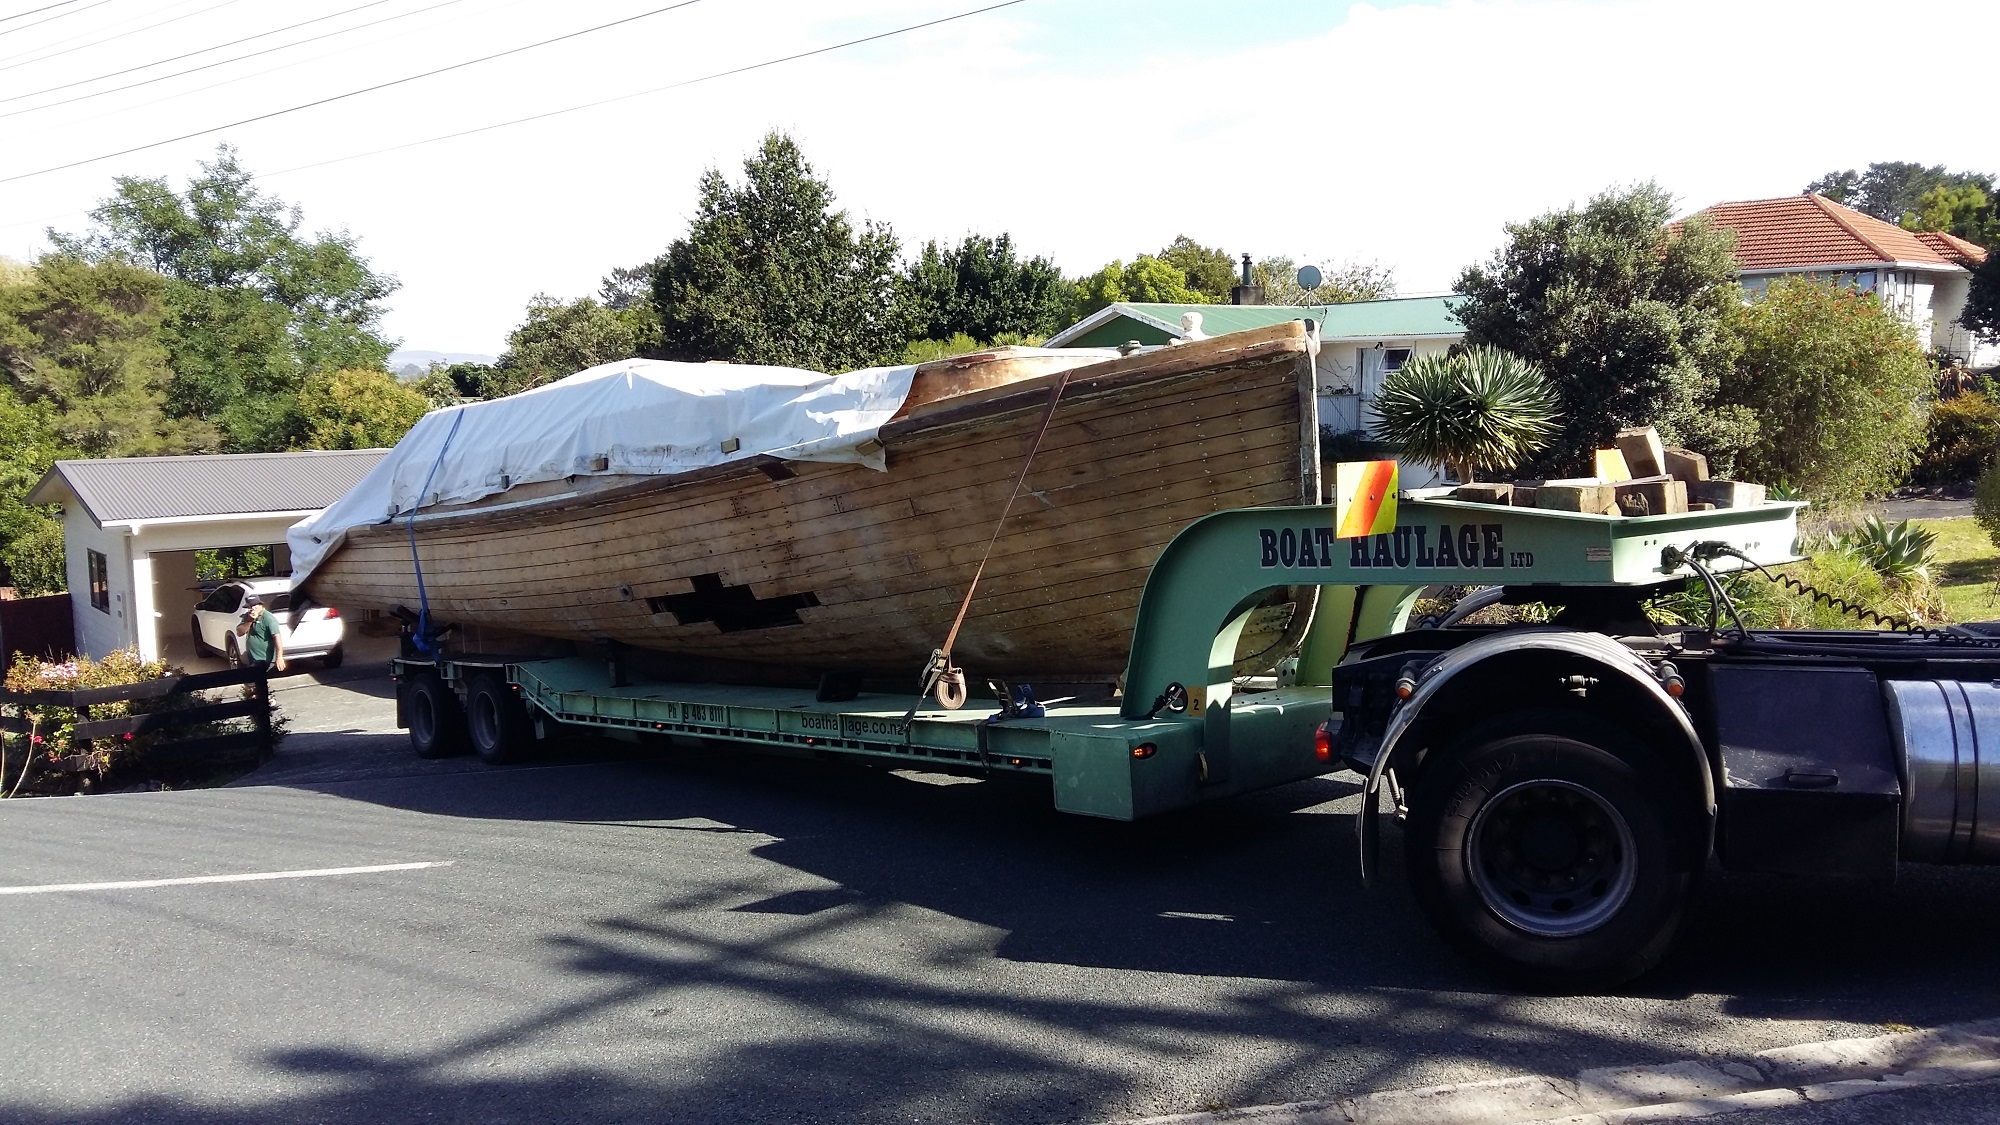
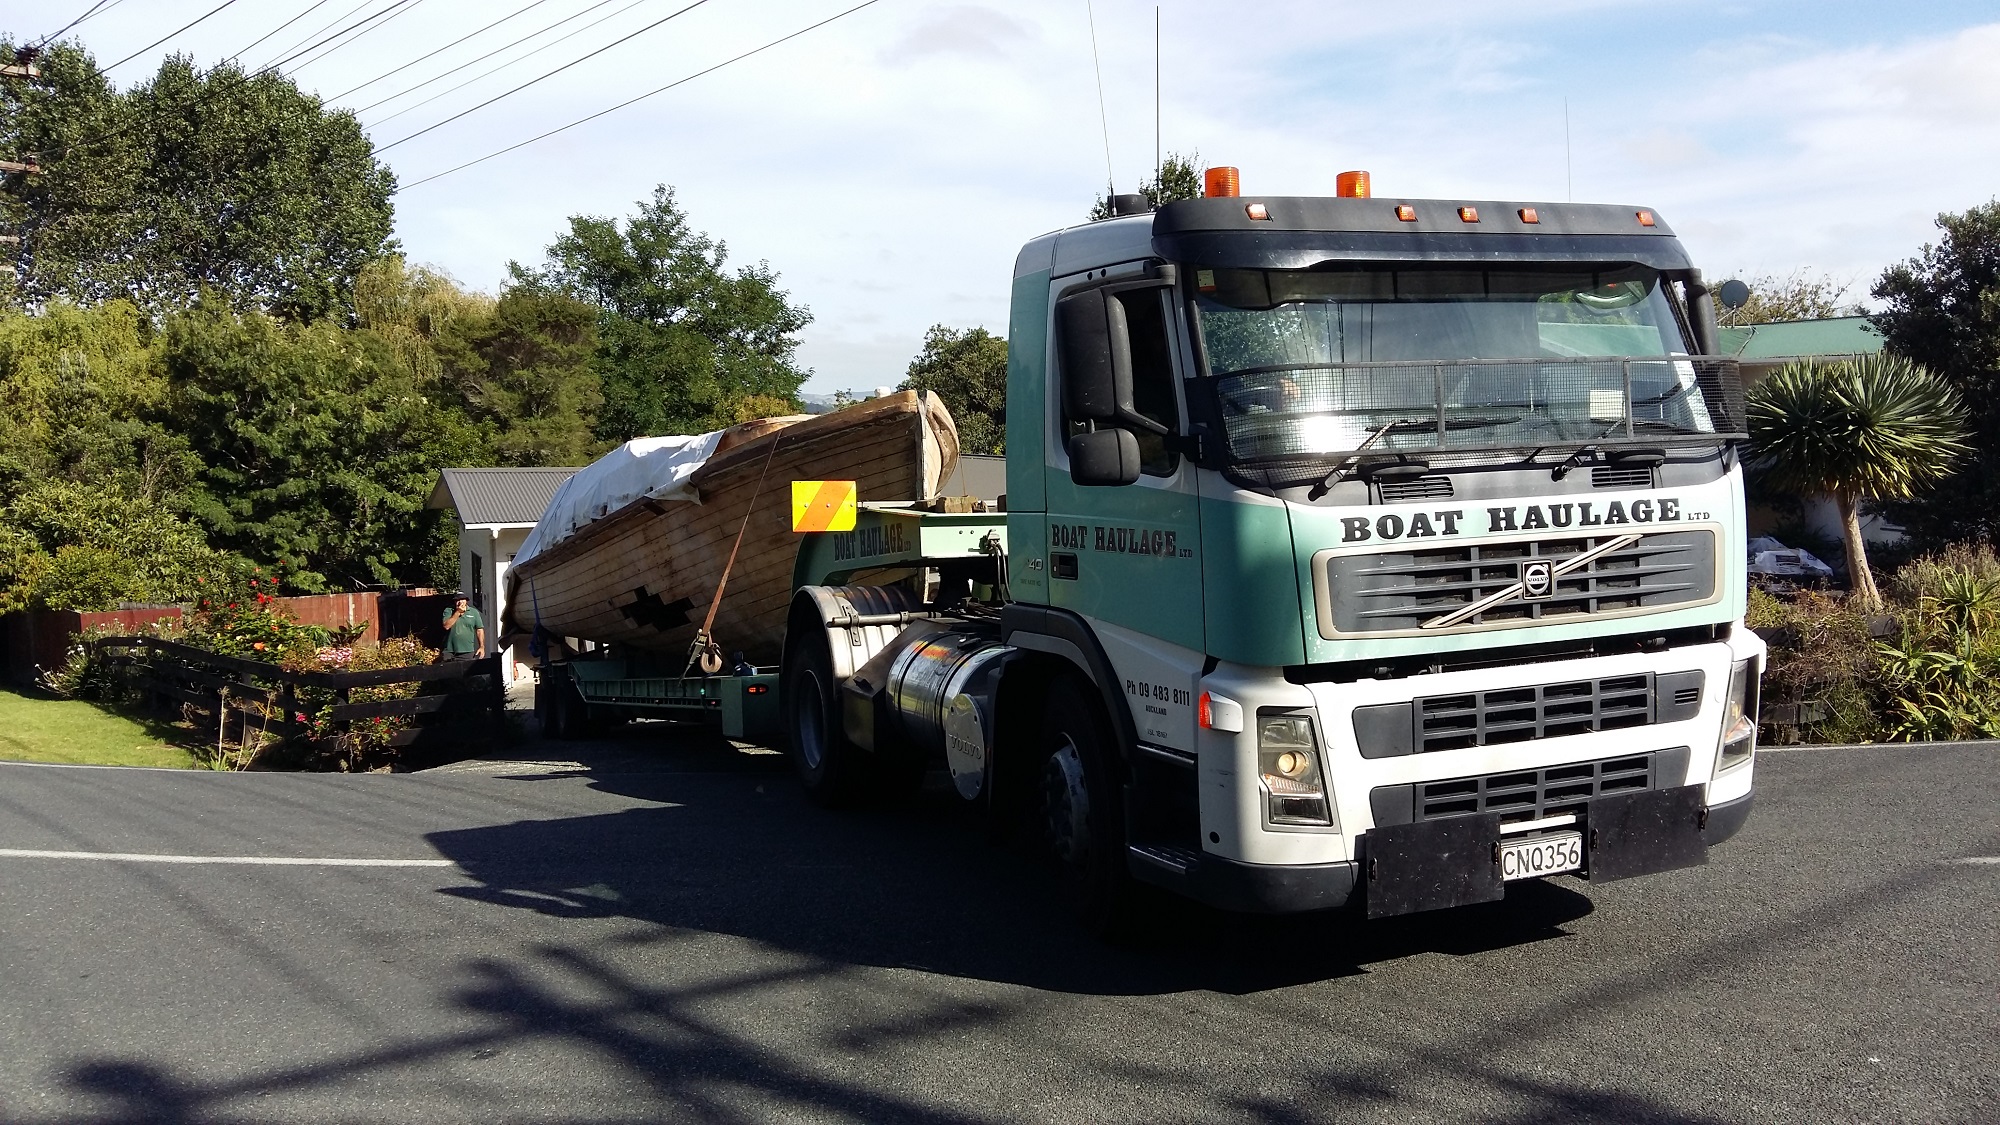
Moving day has finally arrived. Spent the last few weeks removing the canopy and preparing for today. Boat Haulage helped with the move – always impressed with the skill of these guys – a big thumps up to Pete, Luke and the team.
The move was only 5 minutes down the road – so not long enough to blow all the dust out. Now to construct a new cover!
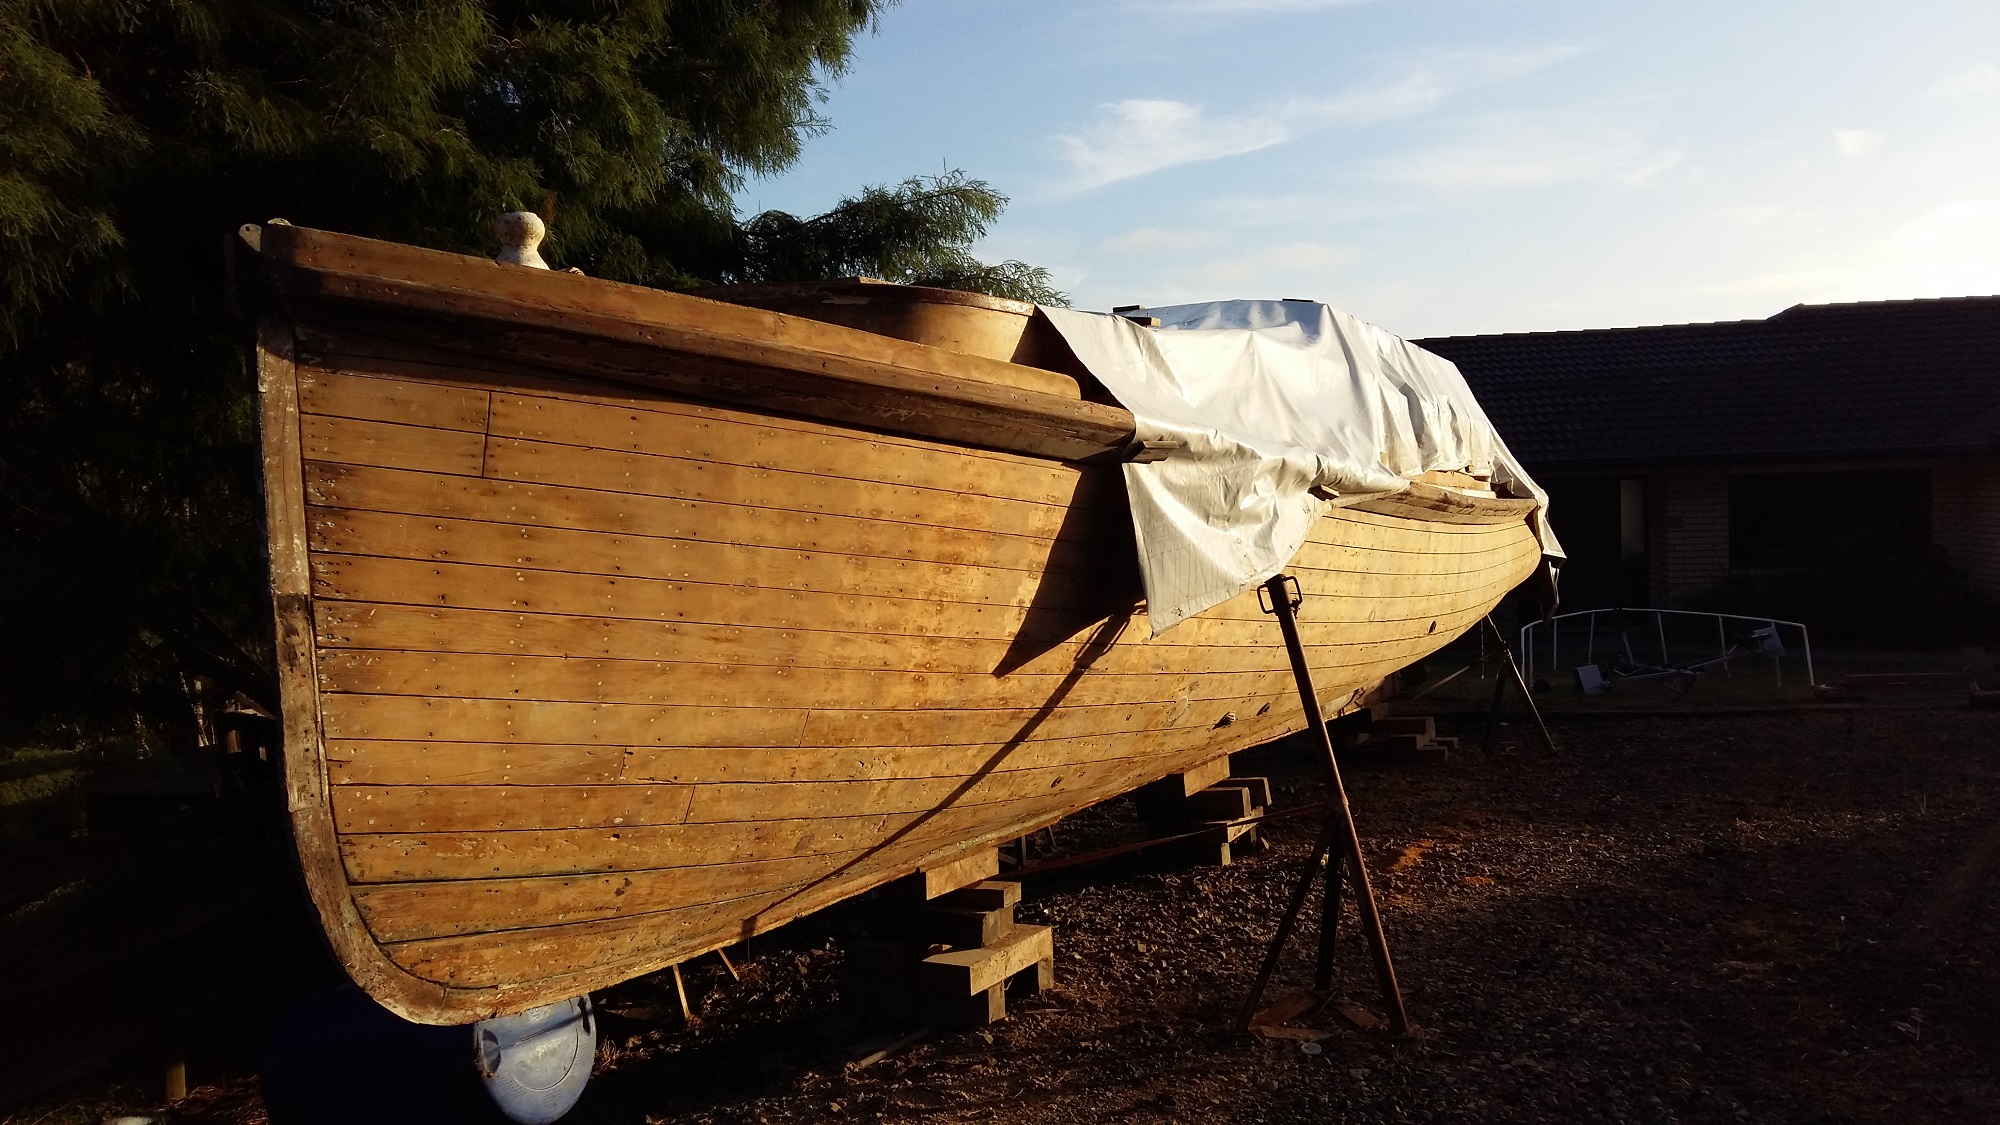
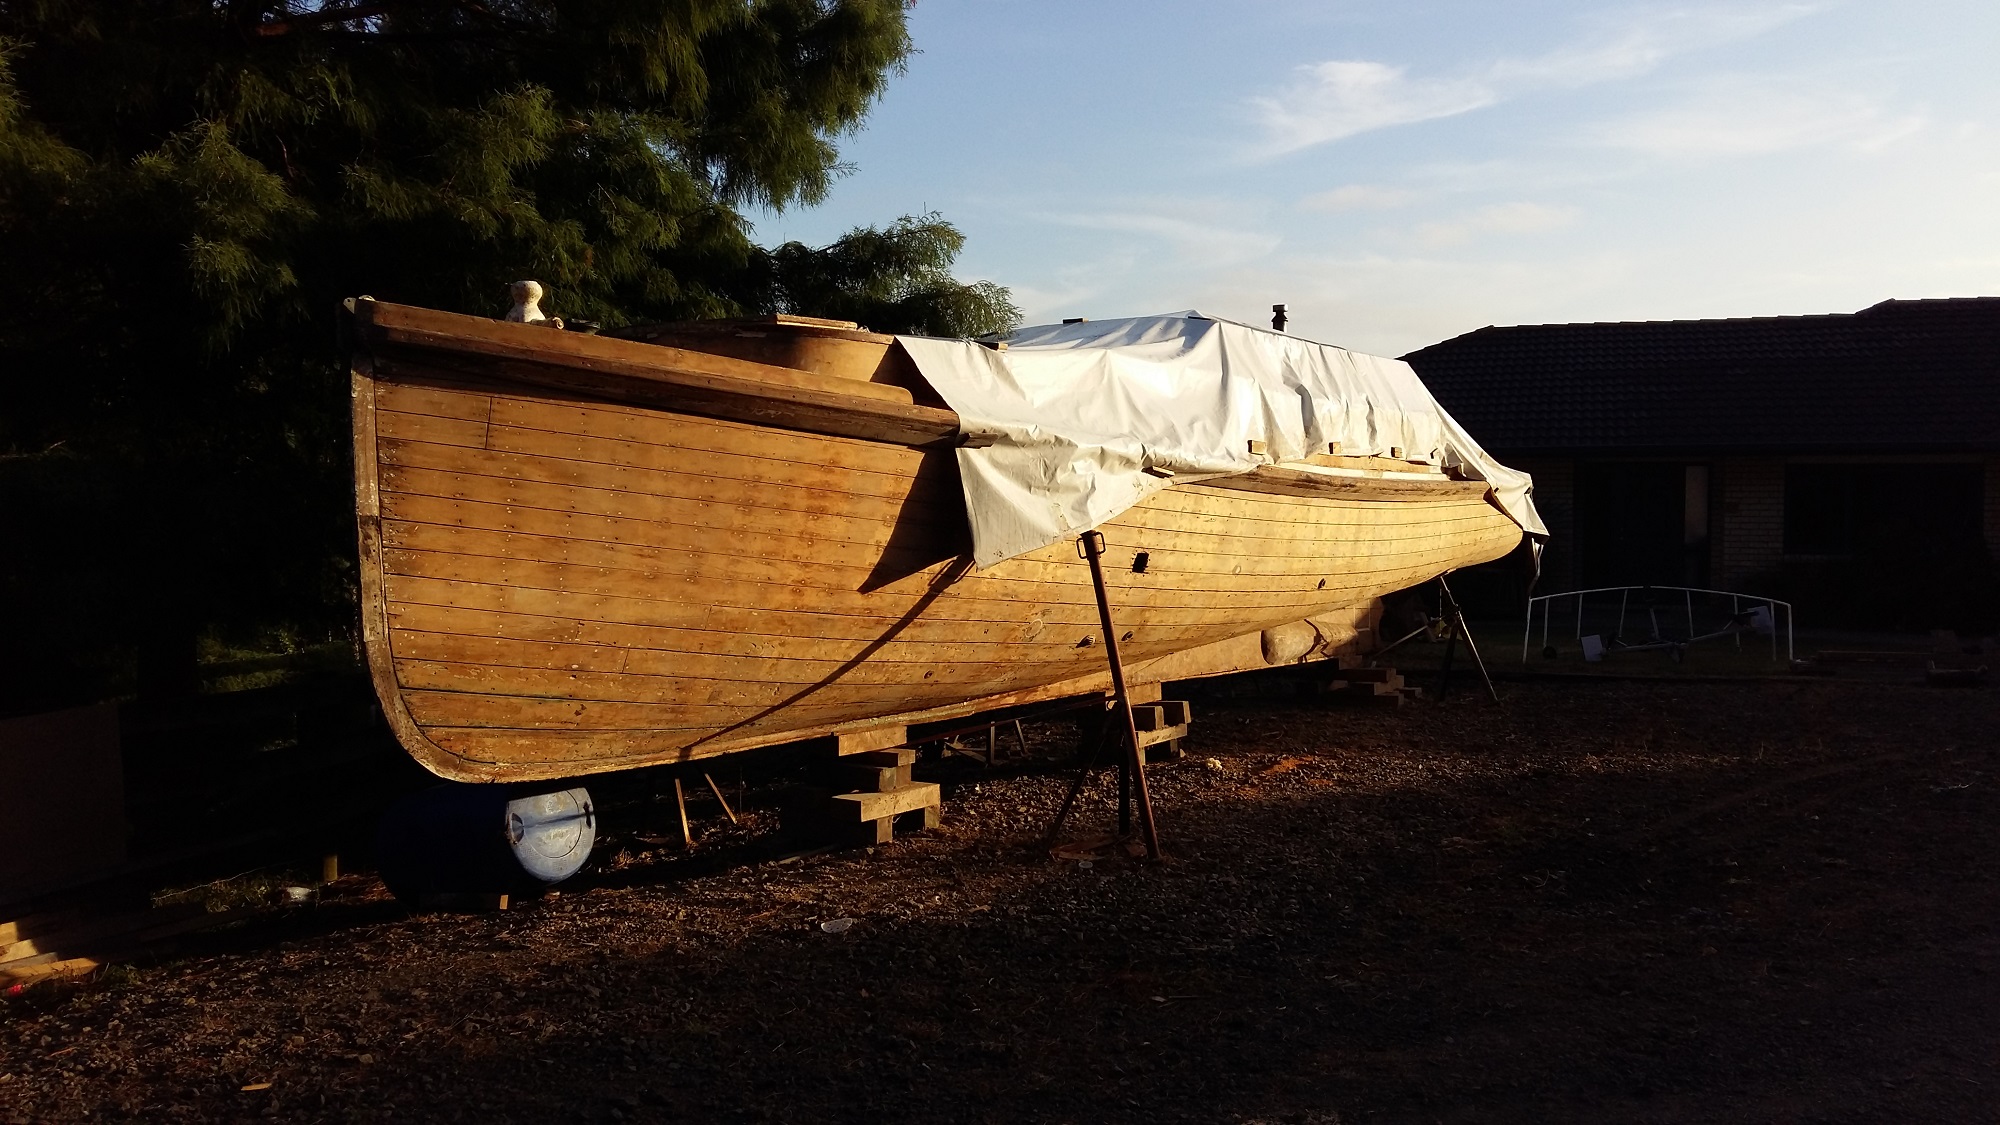
The covers have now been removed and daylight for the first time on ANZAC for the first time in 2 years.
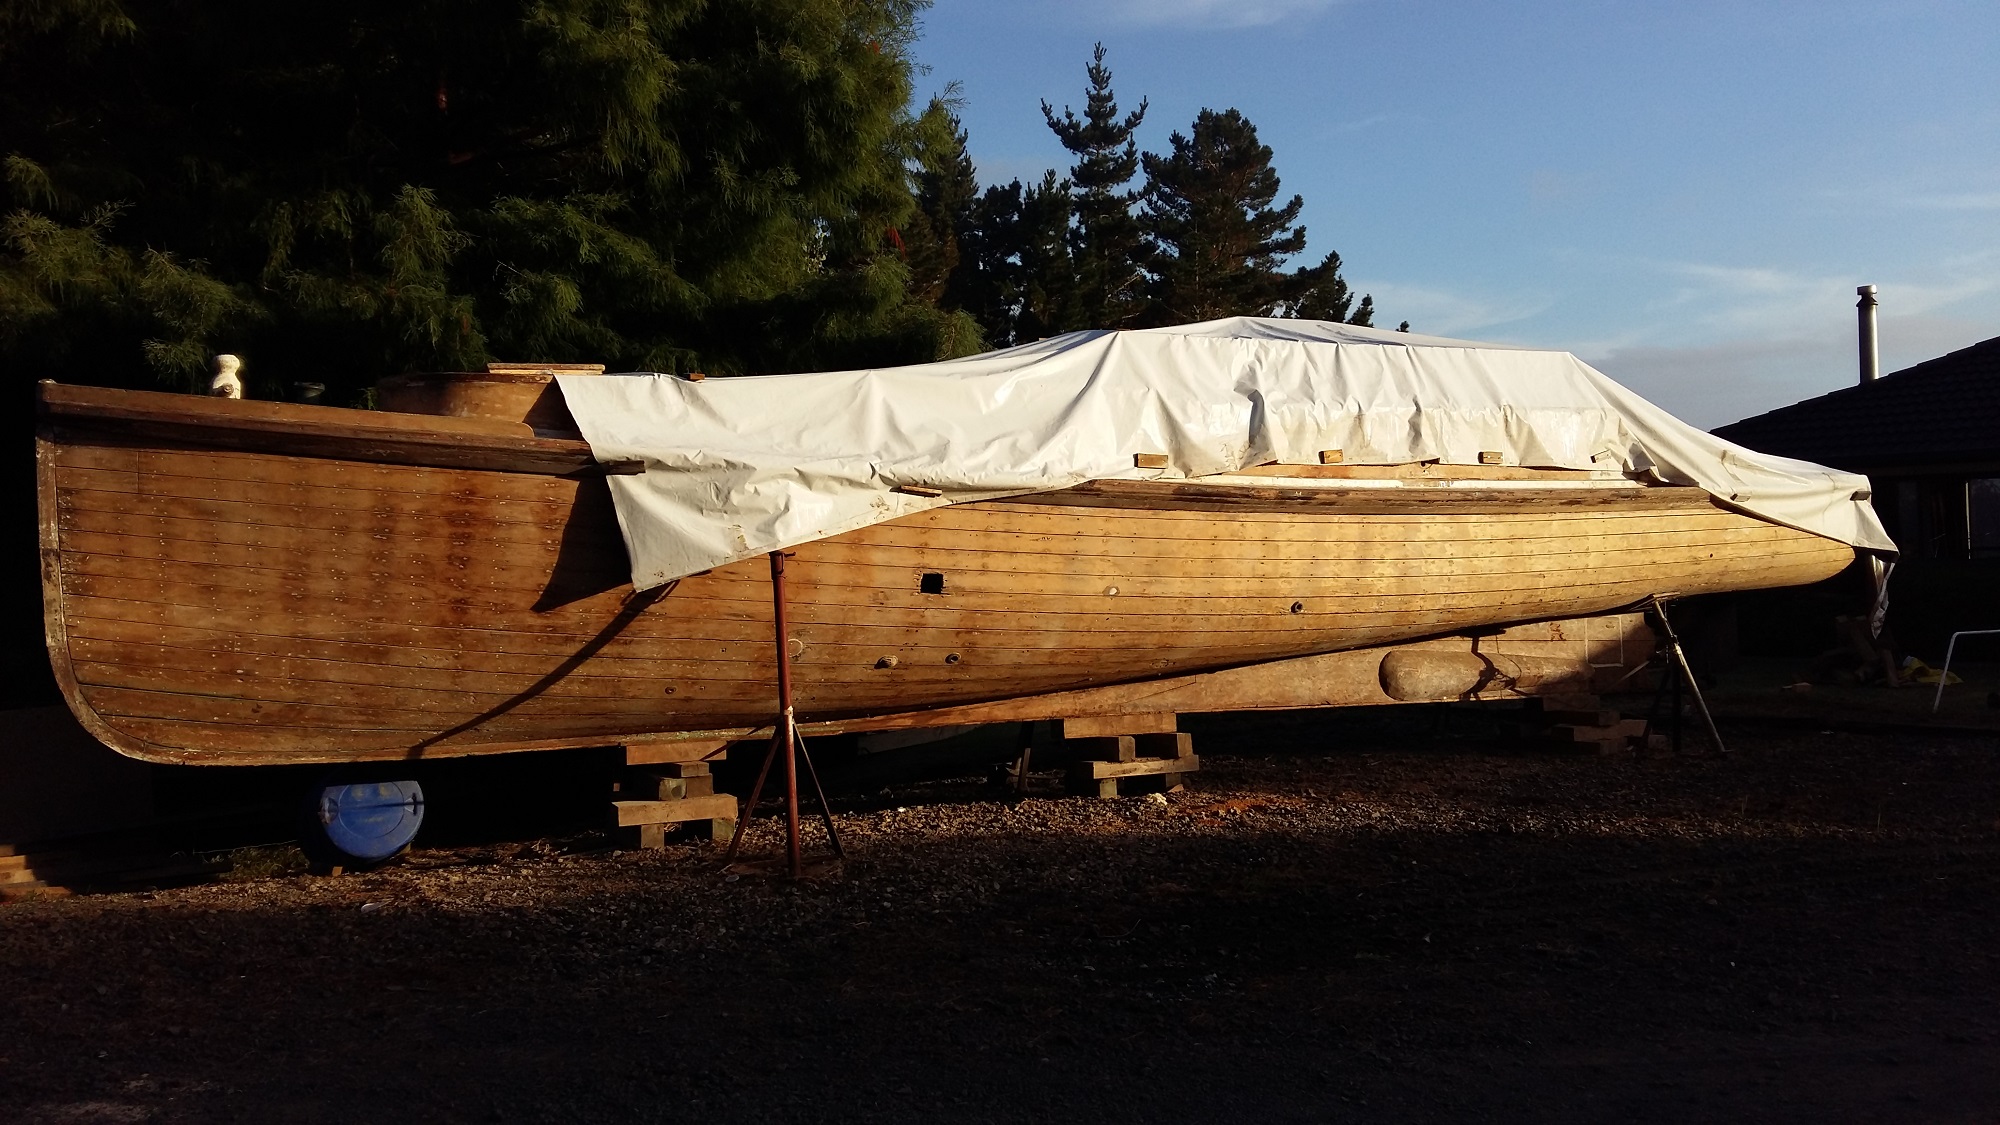
Moving day is now booked in for 4th March with the guys from Boat Haulage. I am now in full pack down mode (House and Launch). Spent last weekend removing the tarps and dismantling the canopy. Have already disposed of a lot of rubbish, having to be practical with what is going back on and what is junk.
As you can see she has been stripped back and has a few holes – hopefully all the dust will get a chance to blow out of her during the move! (I did vacuum already)
A weekly update here – more of the same but a lot more progress. Started the week making more plugs, removing ribs and sanding the interior planks around the bow. I then epoxied in plugs looking to finish off the port side ready for rib installation – only a few rib removals left.
For a change I cut out the damaged planks on the starboard side.
I then opened up the planks around the front stem as they looked in poor condition as well as not sitting right. One of the planks was split so needed to be replaced.
Will have to replace a section of the front stem. Finished the weekend by purchasing some Kauri planks to replace the ones removed.
Purchased a new plug drill bit on the Saturday the old one is worn out. More plugs installed on Sunday – still no end in sight – need to spend a few full days at it – no interesting pictures.
Not much going on at the moment work wise on the boat – spent a few hours on Sunday sanding down the plugs on the port side and then sanding the top deck.
Making plugs are sucking all the fun out of the rebuild. Will post some pictures when I get the chance.